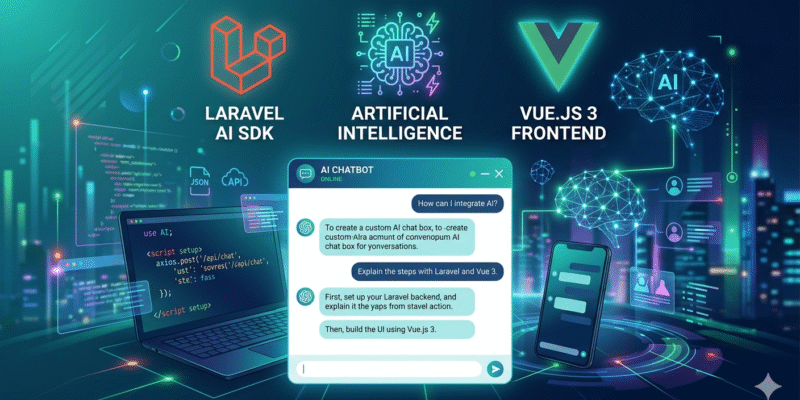
In this blog post we build a custom AI Chatbox in your Laravel project using the new Laravel AI SDK and Vuejs 3 as the frontend.
Prerequisites
- Laravel 10+ project
- PHP 8.1+
- Node.js 18+
- Composer installed
- API key For the AI Provider
Laravel AI SDK provides a robust solution to deal with AI agents. With this package you can create configure different AI providers, create agents, and do more.
Install Laravel AI SDK
composer require laravel/ai
php artisan vendor:publish --provider="Laravel\Ai\AiServiceProvider"
php artisan migrate
This creates the database tables:
agent_conversations– stores conversation sessions.agent_conversation_messages– stores individual messages.
Next setup an .env variable for the AI provider, this depends on your AI provider, if you have OpenAI key:
OPENAI_API_KEY=""
In my case i will use with an open-router API key:
OPENROUTER_API_KEY=""
Create an AI Agent
an agent can be created with artisan command make:agent:
php artisan make:agent SupportBot
An agent is your chatbot identity. You can set system instructions here. Now this agent is created in app/Ai/Agents/ directory
The class skeleton of the Agent like so:
class SupportBot implements Agent, Conversational, HasTools
{
    use Promptable;

    /**
     * Get the instructions that the agent should follow.
     */
    public function instructions(): Stringable|string
    {
        return 'You are a helpful assistant.';
    }

    /**
     * Get the list of messages comprising the conversation so far.
     *
     * @return Message[]
     */
    public function messages(): iterable
    {
        return [];
    }

    /**
     * Get the tools available to the agent.
     *
     * @return Tool[]
     */
    public function tools(): iterable
    {
        return [];
    }
}
Modify the instructions() method like so:
public function instructions(): Stringable|string
    {
        return 'You are a friendly and helpful customer support assistant.';
    }
The instructions() method represent the system prompt sent to the agent.
Next create the controller that will use that Agent.
Create Controller & API Route
Generate a controller:
php artisan make:controller ChatController
Update the ChatController like shown:
<?php

namespace App\Http\Controllers;

use App\Ai\Agents\SupportBot;
use Illuminate\Http\Request;
use Laravel\AI\Agent;
use Laravel\Ai\Enums\Lab;

class ChatController extends Controller
{
    public function sendMessage(Request $request)
    {
        $request->validate([
            'message' => 'required|string',
            'conversation_id' => 'nullable'
        ]);

        $message = $request->input('message');
        $conversationId = $request->input('conversation_id');

        $user = auth()->user();

        $agent = (new SupportBot);

        $agent->forUser($user);

        $response = $agent->prompt(
                prompt: $message,
                provider: Lab::OpenRouter,     // The provider
                model: 'openrouter/free',      // The model
                timeout: 120
            );

        return response()->json([
            'response' => $response->text,
            'conversation_id' => $response->conversationId,
        ]);
    }
}
The sendMessage() method first validates the incoming request for a message and conversation_id inputs, then we make a new SupportBot agent:
$agent = (new SupportBot);
The line $agent->forUser($user) tells that we start a new conversation. Later on we will update this to allow using previous conversation id.
Next we invoke the Agent::prompt() method passing the following parameters:
prompt: The text message,provider: In our example: OpenRouter usingLab::OpenRouterenum.modeltimeout
The result of the prompt() method is an AgentResponse and we can access the text property and conversationId:
return response()->json([
            'response' => $response->text,
            'conversation_id' => $response->conversationId,
        ]);
Next add a route for this controller action in routes/api.php:
<?php
Route::middleware('auth:sanctum')->group(function () {
    Route::post('/chat', [\App\Http\Controllers\ChatController::class, 'sendMessage']);
});
I suppose that you have the Laravel sanctum auth package installed and configured.
Frontend: Vue 3 Component
Create a Vue component at resources/js/Components/ChatBox.vue:
<script setup>
import axios from 'axios';
import { nextTick, onMounted, ref, useTemplateRef } from 'vue';

const messages = ref([]);
const newMessage = ref('');
const conversationId = ref(null);
const loading = ref(false);

axios.defaults.withCredentials = true;

const chatContainer = useTemplateRef('chat-container');

async function sendMessage() {
    if (!newMessage.value.trim()) return;

    // Append user message locally
    messages.value.push({ role: 'user', content: newMessage.value });

    const messageToSend = newMessage.value;
    newMessage.value = '';
    loading.value = true;

    scrollToBottom();

    try {
        const res = await axios.post('/api/chat', {
            message: messageToSend,
            conversation_id: conversationId.value,
        });

        messages.value.push({ role: 'assistant', content: res.data.response });
        conversationId.value = res.data.conversation_id;

    } catch (error) {
        console.error(error);

        messages.value.push({
            role: 'assistant',
            content: 'Error: Could not get a response.',
        });
    } finally {
        loading.value = false;
        scrollToBottom();
    }
}

function scrollToBottom() {
    nextTick(() => {
        const container = chatContainer.value;
        if (container) {
            container.scrollTop = container.scrollHeight;
        }
    });
}

onMounted(() => {

});

</script>

<template>
    <div
        class="bg-whit chat-container fixed right-0 bottom-0 flex h-[500px] w-[350px] flex-col rounded-2xl border shadow"
    >
        <!-- Header -->
        <div class="rounded-t-2xl bg-blue-600 p-3 font-semibold text-white">
            Support Chat
        </div>

        <!-- Messages -->
        <div
            ref="chat-container"
            class="messages flex-1 space-y-2 overflow-y-auto bg-gray-100 p-3"
        >
            <div
                class="flex"
                v-for="(msg, index) in messages"
                :key="index"
                :class="msg.role === 'user' ? 'justify-end' : 'justify-start'"
            >
                <div
                    class="max-w-[70%] rounded-2xl px-4 py-2"
                    :class="
                        msg.role === 'user'
                            ? 'rounded-br-none bg-blue-500 text-white'
                            : 'rounded-bl-none bg-white text-gray-800 shadow'
                    "
                >
                    {{ msg.content }}
                </div>
            </div>
            <!-- Typing Indicator -->
            <div v-if="loading" class="flex justify-start">
                <div
                    class="rounded-2xl rounded-bl-none bg-white px-4 py-2 text-gray-500 shadow"
                >
                    Typing...
                </div>
            </div>
        </div>
        <div class="flex gap-2 border-t p-3">
            <input
                v-model="newMessage"
                @keyup.enter="sendMessage"
                placeholder="Type a message..."
                class="flex-1 rounded-full border px-4 py-2 focus:ring-2 focus:ring-blue-400 focus:outline-none"
            />
            <button
                @click="sendMessage"
                :disabled="loading"
                class="rounded-full bg-blue-500 px-4 py-2 text-white hover:bg-blue-600"
            >
                Send
            </button>
        </div>
    </div>
</template>
Include that component into the a footer component or the main layout of the frontend app.
<div id="app">

    <footer>
       <chat-box></chat-box>
    </footer>
</div>
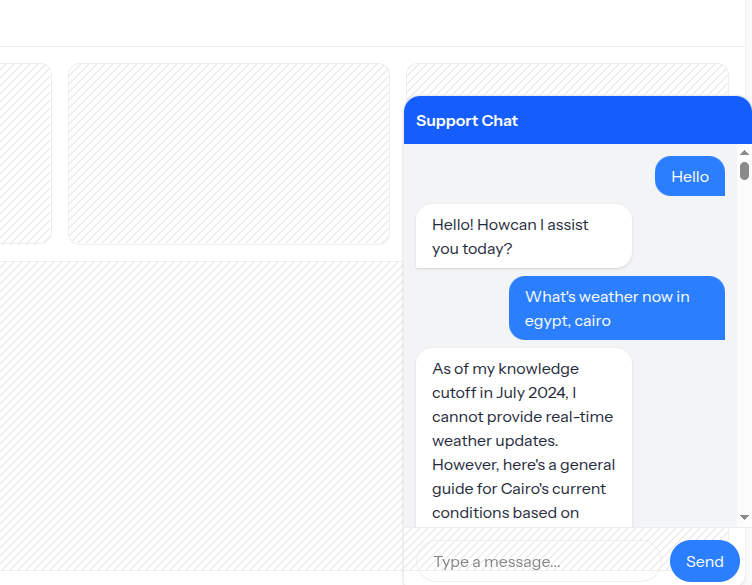
It should appear as a box in bottom right corner like this figure:
In the <chat-box /> we declared some state variables using vue ref() API, like the messages to store the chat messages, newMessage to bind it to the chat input text, the conversationId to store the conversation id, and a loading indicator.
The sendMessage() function send a new message with the axios library. We check the newMessage.value to be not empty:
if (!newMessage.value.trim()) return;
Before sending the message we append the messages array with the new message value:
messages.value.push({ role: 'user', content: newMessage.value });
This is to make the message appear instantly in the chat area without waiting to ajax request to complete.
Then we call a helper function scrollToBottom() which main job to scroll to bottom of chat box upon sending the message.
The axios request is wrapped between a try catch block in case of any server errors to be handled:
try {
    const res = await axios.post('/api/chat', {
            message: messageToSend,
            conversation_id: conversationId.value,
        });
}
When receiving the response we push the result to the messages array and set the conversationId:
messages.value.push({ role: 'assistant', content: res.data.response });
conversationId.value = res.data.conversation_id;
In the component <template> we rendering a <div> styled using tailwindcss classes. The <div class="messages"> container display all the messages, we do so using v-for expression over the messages variable:
<div
                class="flex"
                v-for="(msg, index) in messages"
                :key="index"
                :class="msg.role === 'user' ? 'justify-end' : 'justify-start'"
            >

</div>
We pass a different css class to each message line by checking the msg.role so that each message appear in different direction, something like messenger chat style.
We display a Typing… indicator underneeth the messages <div> to add the effect that something is being sent.
And finally we display the chat form at the bottom which have an <input type="text" v-model="newMessage" /> and a submit button.
With this setup if you try send a chat message, you will receive some response from the agent.
Persisting Chat History
So far right now the chat agent is unaware of the previous chat history or context. For example you send a message and the agent responds and this internally represent a separate chat messages that doesn’t belong to particular conversion.
To make the agent stores and keep track of the conversation history, the RemembersConversations trait should be used:
<?php

namespace App\Ai\Agents;

use Laravel\Ai\Concerns\RemembersConversations;
use Laravel\Ai\Contracts\Agent;
use Laravel\Ai\Contracts\Conversational;
use Laravel\Ai\Contracts\HasTools;
use Laravel\Ai\Promptable;

...
...

class SupportBot implements Agent, Conversational, HasTools
{
    use Promptable, RemembersConversations;   // <------

    ...
}
Once added this trait persists the conversation messages to the database.
Update the ChatController::sendMessage() to tell the agent to continue conversation if there is conversationId using the agent::continue() method:
$user = auth()->user();

        $agent = (new SupportBot);

        if($conversationId) {
            $agent->continue($conversationId, as: $user);   // <-------- Continue conversation
        } else {
            $agent->forUser($user);
        }

        $response = $agent->prompt(
                prompt: $message,
                provider: Lab::OpenRouter,
                model: 'openrouter/free',
                timeout: 120
            );
The next thing to update the <chat-box /> vue component to store the conversation_id in browser local storage, make these edits:
ChatBox.vue:
In the sendMessage() function under this line:
conversationId.value = res.data.conversation_id;
Add:
localStorage.setItem('conversation_id', conversationId.value);
And update the onMounted() hook at the end of the script like this:
onMounted(() => {
    // Load saved conversation ID
    const savedId = localStorage.getItem('conversation_id');
    if (savedId) {
        conversationId.value = savedId;
    }
});
With this in place, when sending a new chat message and inspecting the database you will see the conversation inserted into the agent_conversation and agent_conversation_messages. What’s interesting is that subsequent messages added to the same conversation.
Reloading Chat Messages In Frontend
To display the chat messages when reloading the page, we will add another controller action in the ChatController, this will fetch the conversation messages from the database:
<?php

namespace App\Http\Controllers;

use App\Ai\Agents\SupportBot;
use Illuminate\Contracts\Auth\MustVerifyEmail;
use Illuminate\Http\Request;
use Illuminate\Support\Facades\DB;
use Inertia\Inertia;
use Laravel\AI\Agent;
use Laravel\Ai\Enums\Lab;

class ChatController extends Controller
{
    public function loadConversation(Request $request)
    {
        $conversationId = $request->input('conversation_id');

        if (!$conversationId) {
            return response()->json([
                'messages' => []
            ]);
        }

        $conversation = DB::table('agent_conversations')
            ->where('id', $conversationId)
            ->where('user_id', auth()->user()->id)
            ->first();

        if (!$conversation) {
            return response()->json([
                'messages' => []
            ]);
        }

        // Format messages for frontend
        $messages = DB::table('agent_conversation_messages')
            ->where('conversation_id', $conversationId)
            ->orderBy('created_at', 'asc')
            ->get()
            ->map(function ($msg) {
                return [
                    'role' => $msg->role,
                    'content' => $msg->content,
                ];
            });

        return response()->json([
            'messages' => $messages
        ]);
    }

   ...
   ...
   ...
}
The loadConversation() method accepts a conversation_id as an input and query the agent_conversations and agent_conversation_messages tables:
$messages = DB::table('agent_conversation_messages')
            ->where('conversation_id', $conversationId)
            ->orderBy('created_at', 'asc')
            ->get()
            ->map(function ($msg) {
                return [
                    'role' => $msg->role,
                    'content' => $msg->content,
                ];
            });
After receiving the messages we attach laravel map() method to transform this into an array of chat messages consisting of role and content keys.
Finally we return a json response with the chat messages.
Add a route for this controller action in routes/api.php:
<?php
Route::middleware('auth:sanctum')->group(function () {

    Route::get('/chat/load', [\App\Http\Controllers\ChatController::class, 'loadConversation']);
    Route::post('/chat', [\App\Http\Controllers\ChatController::class, 'sendMessage']);
});
Update the ChatBox.vue:
First add this function after sendMessage() function:
async function loadMessages() {
    try {
        const {data} = await axios.get('/api/chat/load', {
            params: {
                conversation_id: conversationId.value
            }
        });

        messages.value = data.messages;

        scrollToBottom();

    } catch (error) {
        console.error(error);
    }
}
Then invoke this function on the onMounted() hook:
onMounted(() => {
    // Load saved conversation ID
    const savedId = localStorage.getItem('conversation_id');
    if (savedId) {
        conversationId.value = savedId;
    }

    // Load previous messages
    loadMessages();
});
This way the old messages will be displayed after reloading the page.
What we done so far is a global AI Chat Agent that responds to generic questions. What about if we need to make the chat agent deal we website data as the agent context such as a knowledge base?
This can be done by implementing messages() function and Conversational interface in the agent class:
/**
     * Get the list of messages comprising the conversation so far.
     *
     * @return Message[]
     */
    public function messages(): iterable
    {
        return [];
    }
In this method you have to write the logic that fetch the messages history to feed the agent with data. In Laravel AI SDK docs, already an example for this you can check.
And here an example, if you have a Faq table with help data you can do something like this:
public function messages(): iterable
{
    $faqs = \App\Models\Faq::latest()->limit(20)->get();

    $faqText = $faqs->map(fn($faq) =>
        "Q: {$faq->question}\nA: {$faq->answer}"
    )->implode("\n\n");

    return array_merge(
        [
            new Message('system', 'You are a support assistant. Use the FAQ below.'),

            new Message('system', $faqText),
        ],
        parent::messages()
    );
}